Windows 快速安裝 Loki 方法
最近有機會在 Windows 測試機上安裝 Loki 服務,來解決長久以來查看文字 txt log 的問題。同事原本想用 ELK 方案,不過這是一個非常吃資源的大怪獸,後來我們決定試試我玩過的 Loki。
前面研究的 Loki
說來慚愧,之前在我家主要蒐集 traefik 的一些 log,相關設定我沒有到很熟悉。
- Loki 初體驗教學(在Raspberry 啟用 Docker-Loki-Driver) - 程式狂想筆記
- Loki 做監控動作方法 - 程式狂想筆記
- 在 Kubernetes 用 Loki 蒐集 log 做監控警告通知方法整理筆記 - 程式狂想筆記
主要我知道 ELK 對應到 Loki 一樣有三個元件:Grafana + Loki + Promtail,它們對應做的事情也差不多。
Grafana:查詢 Loki 紀錄的平台。
Loki:蒐集 log 的地方。
Promtail:對應 Filebeat,負責解析 log 並傳送到 Loki(類似 ELK 中的 Filebeat 傳到 ElasticSearch)。
安裝 Lab 說明
這次因為我的環境只有一台機器,Promtail 不打算安裝,這邊的規劃是 .Net 專案除了會記錄 txt log,也會直接推送 log 到 Loki。
:::info
這邊推薦看以下專業安裝教學,本文內容是從這些文章整理而來:
- 【.NET 6+Loki+Grafana】實現輕量級紀錄檔視覺化服務功能 - tw511教學網
- windows本地 Loki+Promtail+Grafana_promtail配置文件-CSDN博客
- 【.NET 6+Loki+Grafana】实现轻量级日志可视化服务功能 - 知乎
:::
安裝教學
Grafana
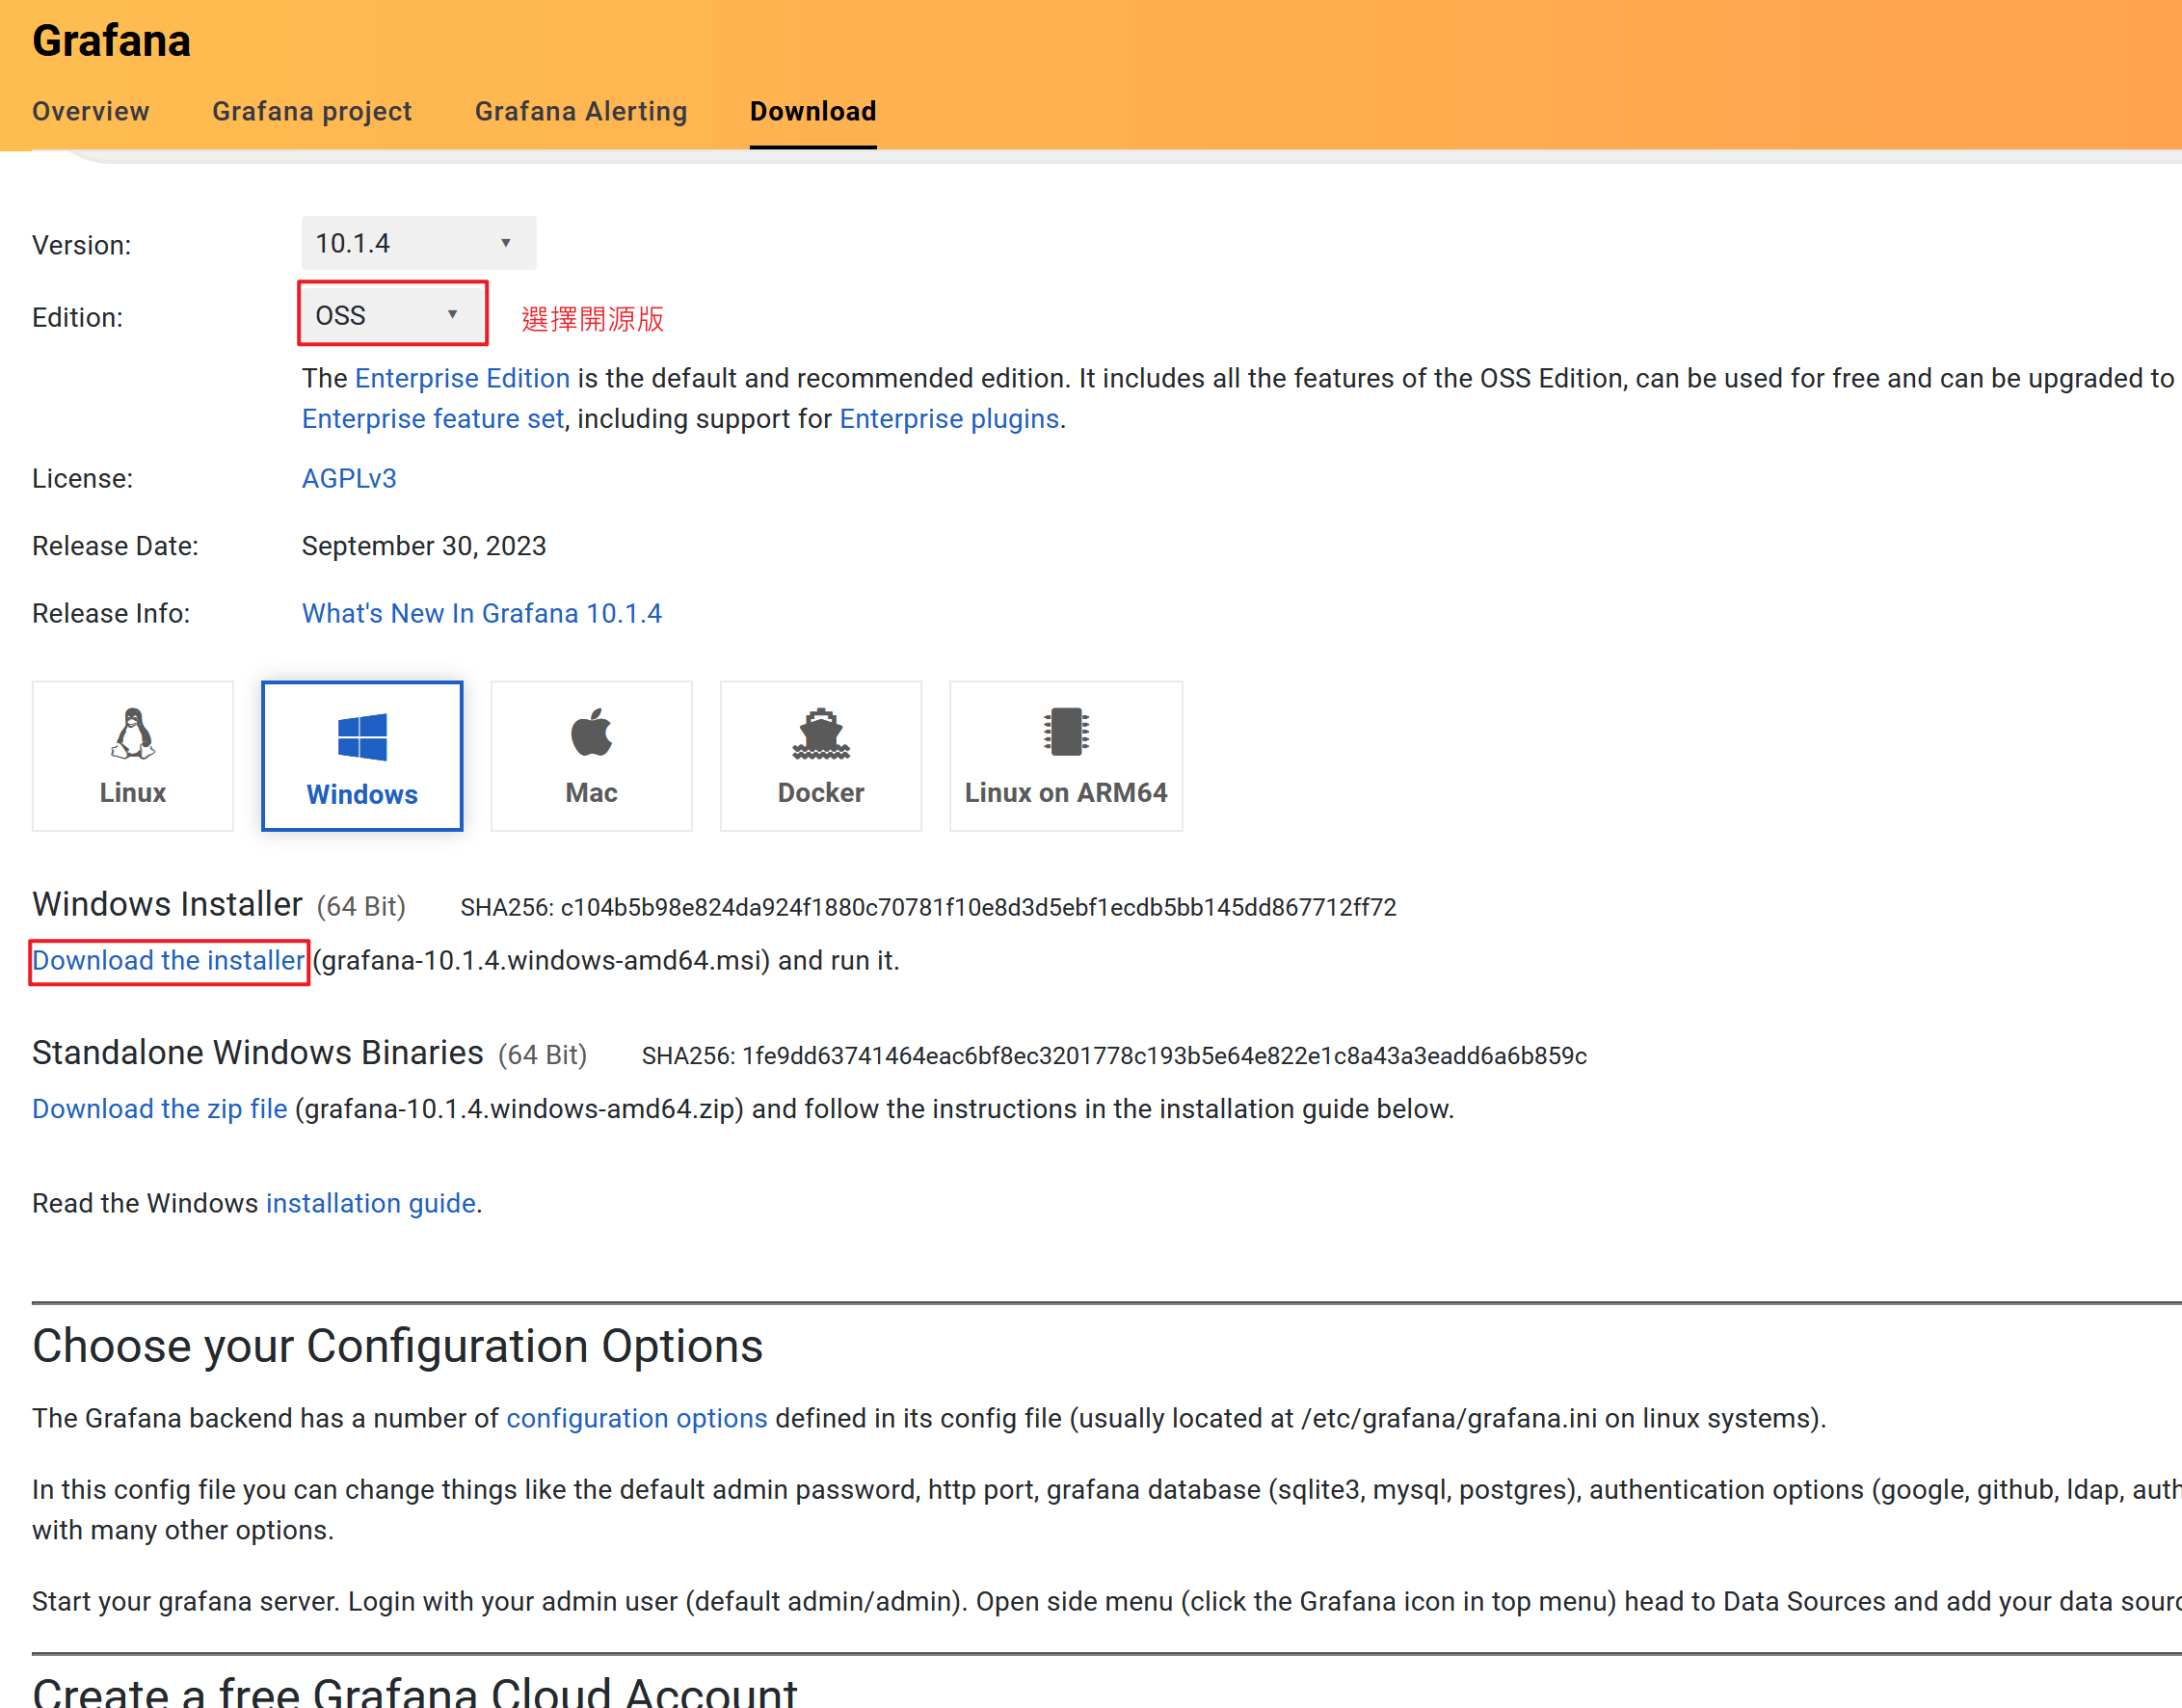
點這邊下載 Grafana。
安裝 Grafana 就不詳細說明,就一直下一步就對了。
Loki
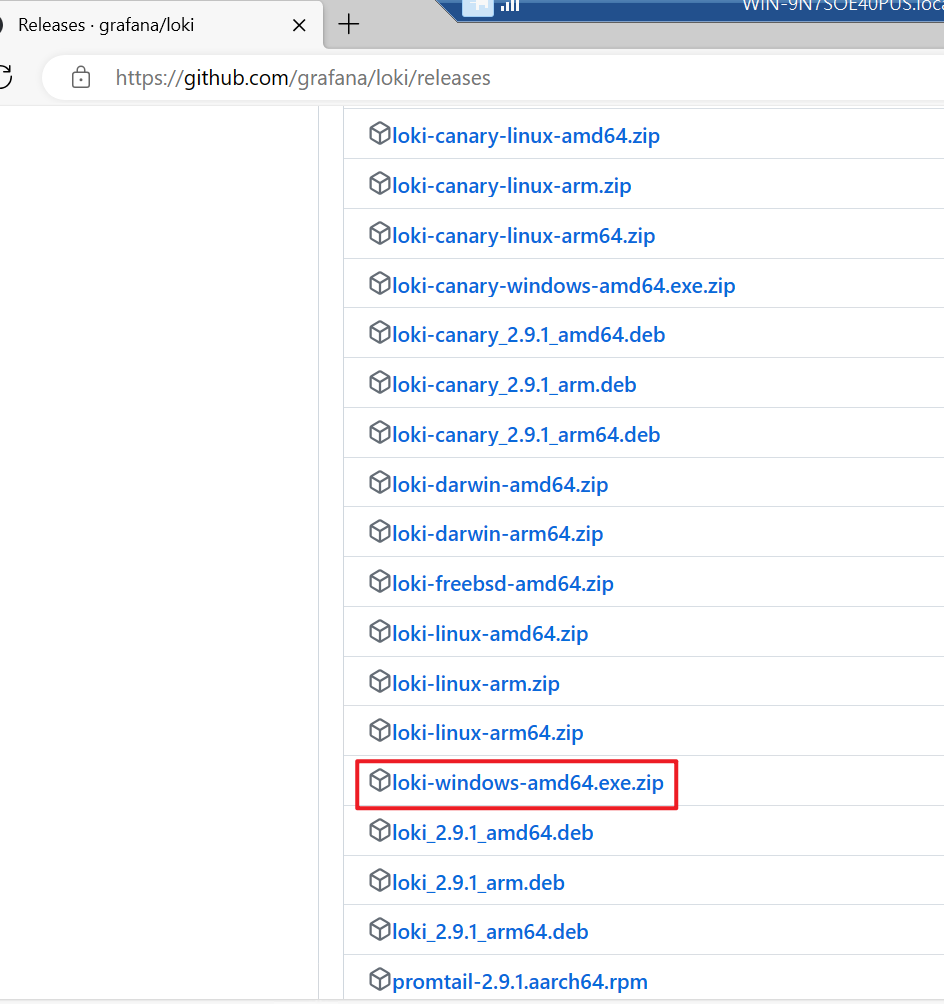
從 Github grafana/loki 這邊下載 loki-windows-amd64.exe.zip,注意這邊不是 lokicli 開頭喔!
Promtail
本環境不打算安裝 Promtail,如果需要可以參考以下文章:
設定 Loki Config
可以到官方查看設定檔說明:Grafana Loki configuration parameters | Grafana Loki documentation,官方文件裡面也有放範例。
這邊使用官方的 Local-Configuration-Example.yaml,將設定檔存成 config.yaml。
|
|
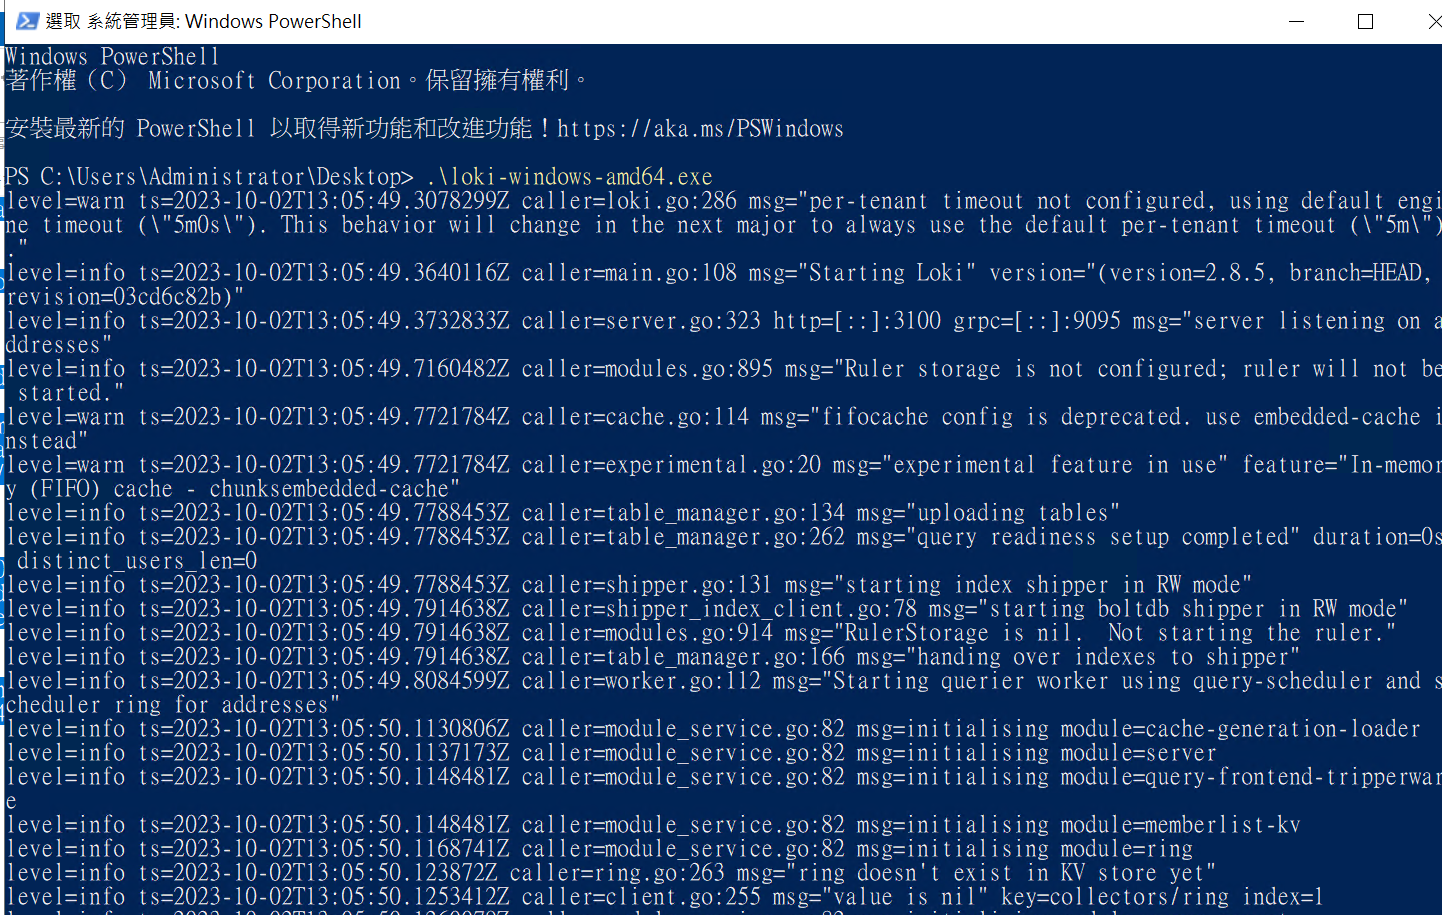
這邊設定完就可以直接在 PowerShell 執行 loki 程式。一般教學都會教你加上 config 參數,但我比較懶。😅
登入 Grafana
登入 Grafana 頁面,網址是 http://localhost:3000/login,帳號密碼都是 admin。進入之後會要求你重新設定新密碼。
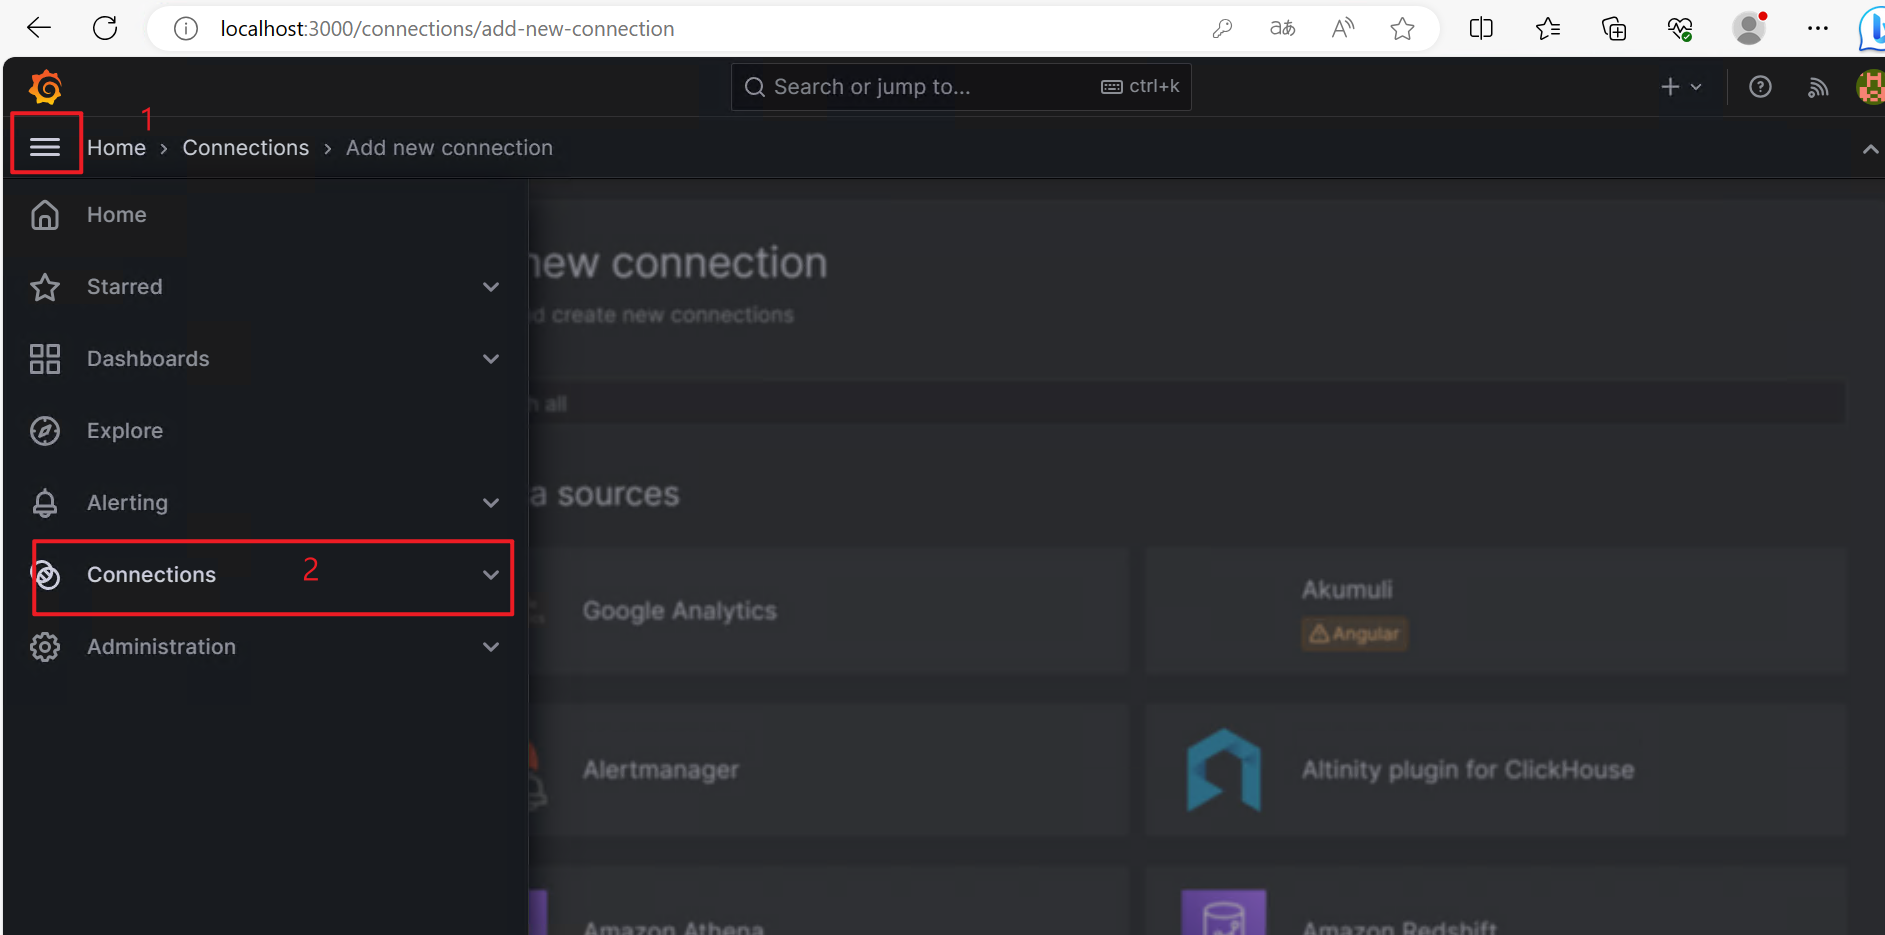
進入 Grafana 後,前往 Connections 功能頁。
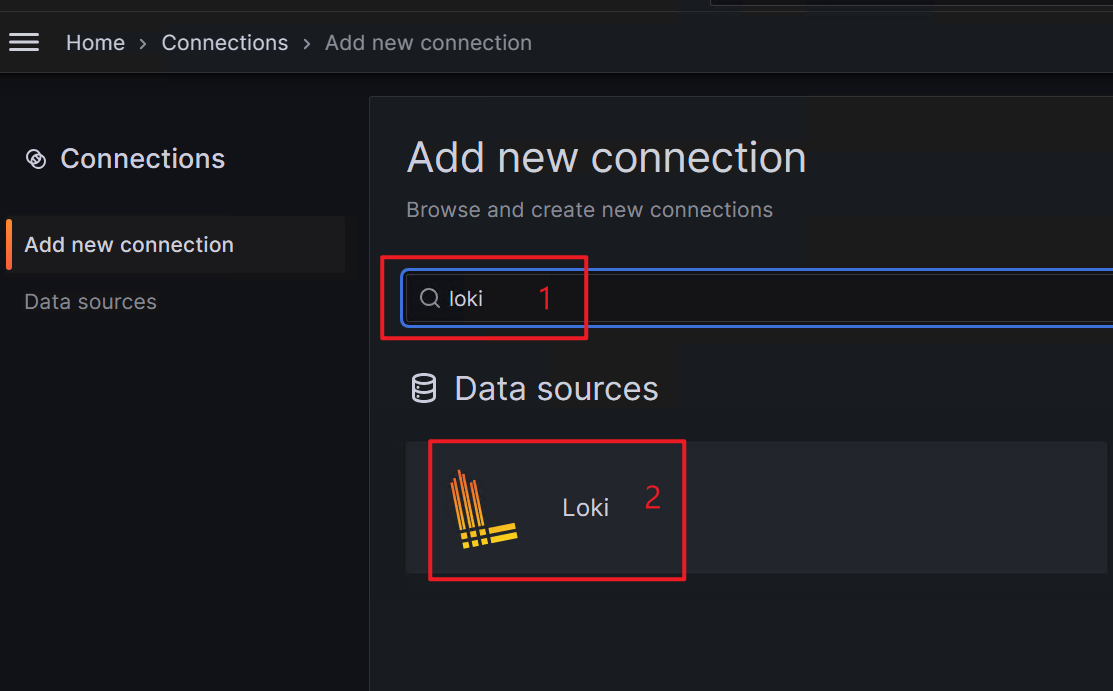
搜尋 loki,選擇 Loki。
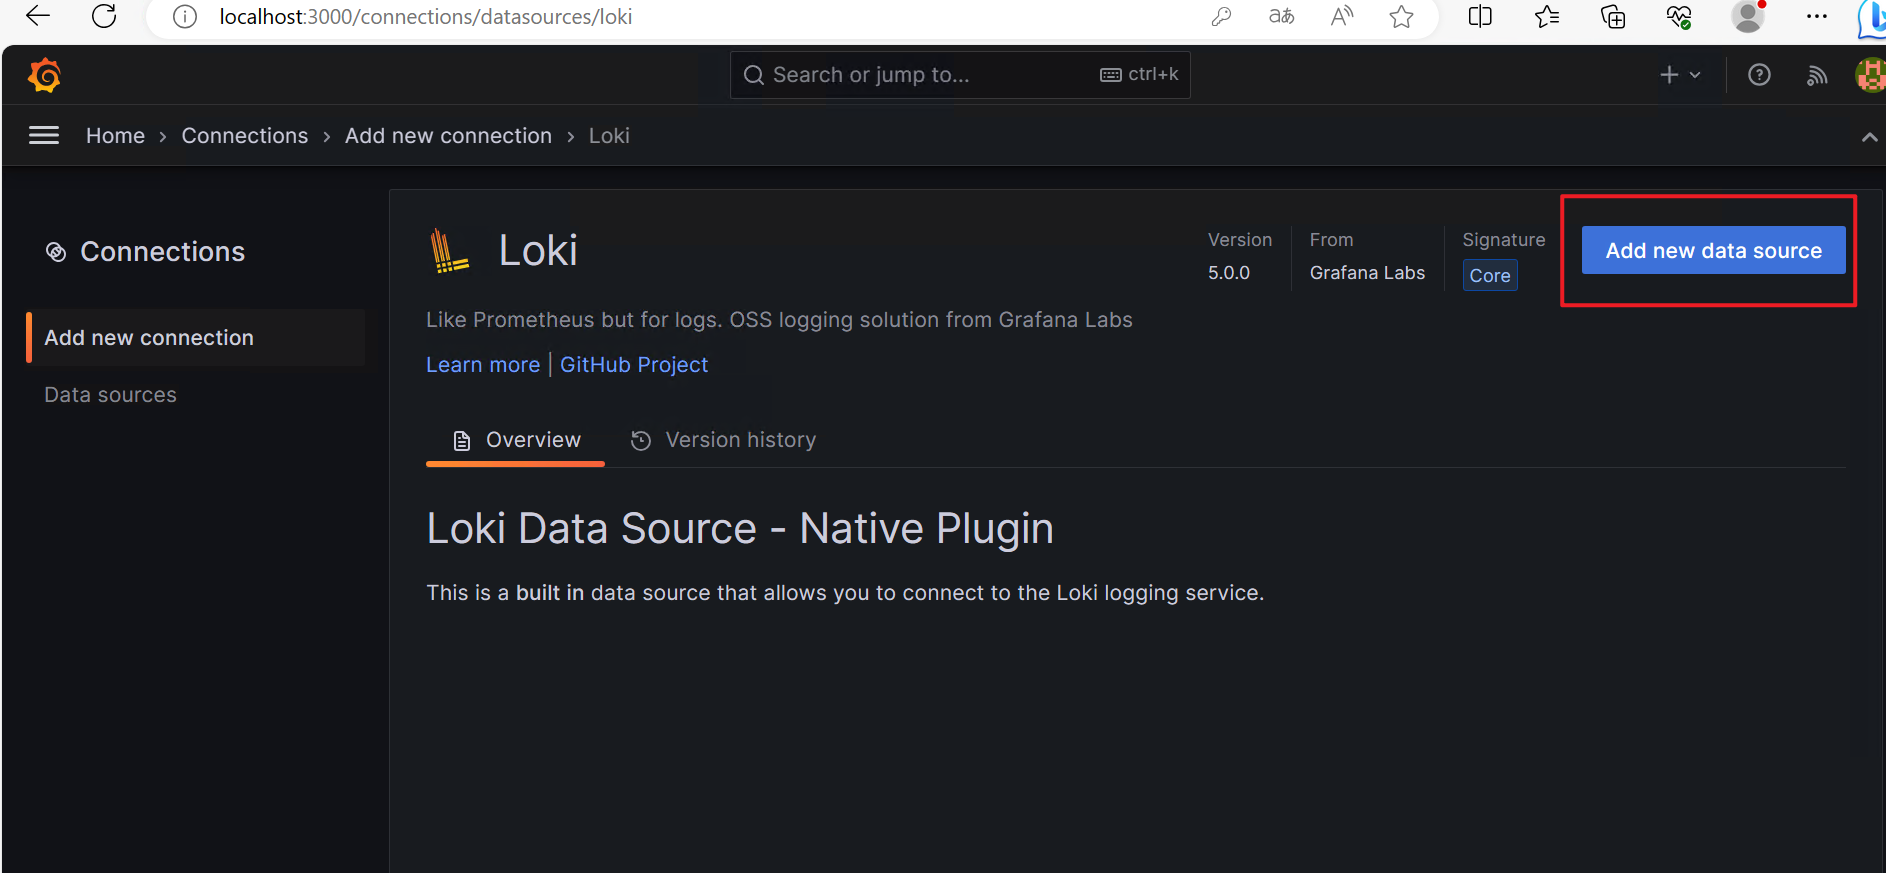
選擇 Add new data source。
URL 輸入 http://localhost:3100,然後可以按 Save & test。
別擔心,你可能還沒看到成功訊息。通常如果你有安裝 Promtail 並正確設定,可能就會成功。
|
|
這個訊息簡單來說,是因為目前 Loki 裡面是空的,所以 Grafana 不給你加入。這時候只要簡單呼叫 API 就可以解決了。開啟 Git Bash,執行下面語法:
|
|
參考:Grafana Loki HTTP API | Grafana Loki documentation
完成後,再按一次 Save & test 即可成功。
:::warning
注意:如果打 Loki push API 沒有成功,但不影響後續操作。你可能會得到 entry for stream '{foo="bar2"}' has timestamp too old: 2019-10-12T02:23:58+08:00, oldest acceptable timestamp is: 2023-09-25T21:35:56+08:00 錯誤。原因是範例中的時間太舊,你可以改成現在的時間戳記。
時間轉換可用:Unix时间戳(Unix timestamp)转换工具 - 站长工具
:::
把 Loki 設定成 Windows Service
方法一:使用 sc 命令
可以使用 Windows 內建的 sc 命令來新增服務:
|
|
但這個方法在實際使用上可能會有一些限制。
參考:
方法二:使用 WinSW
推薦使用 WinSW(Windows Service Wrapper)來註冊服務。建立一個 XML 設定檔:
|
|
使用 WinSW 的常用命令:
|
|
彩蛋
以下是一些相關的參考資料:
- .NET Worker Service 作为 Windows 服务运行及优雅退出改进 - 知乎
- 日志系统新贵 Loki,真香!!-阿里云开发者社区
- 轻量级日志系统Loki原理简介和使用(2)-阿里云开发者社区 備份圖
- Add username into Serilog - Stack Overflow
- Grafana 儀錶板查詢 Loki 顯示 too many outstanding requests | by Ivan Cheng | Medium
如果遇到多人查詢時出現 too many outstanding requests 錯誤,可以參考最後一篇文章的解決方法。
